How Can We Help?
Menu Category Set Up
Tray ticket set up (the order the menu categories will appear in on the ticket/duplicate tickets) for Production.
1.
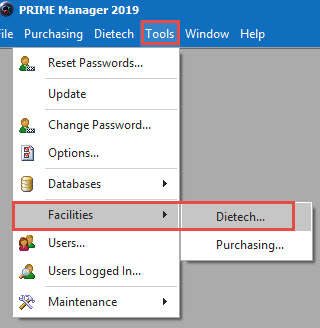
Go to your Facility Settings.
2.
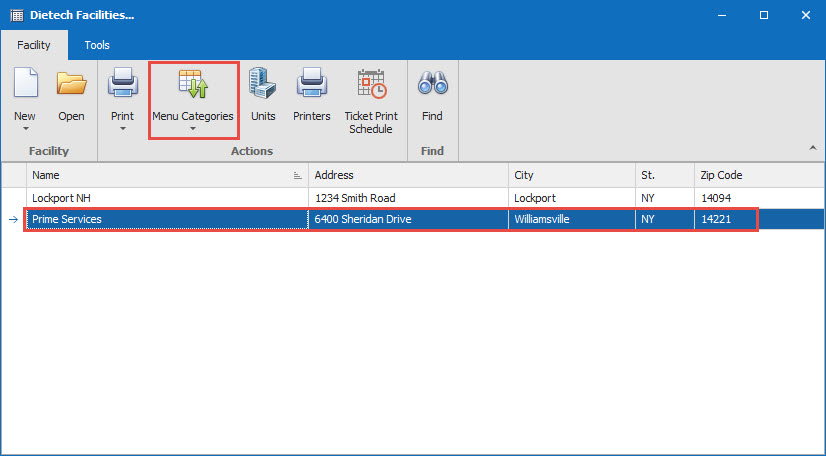
Highlight your facility and click on Menu Categories.
3.
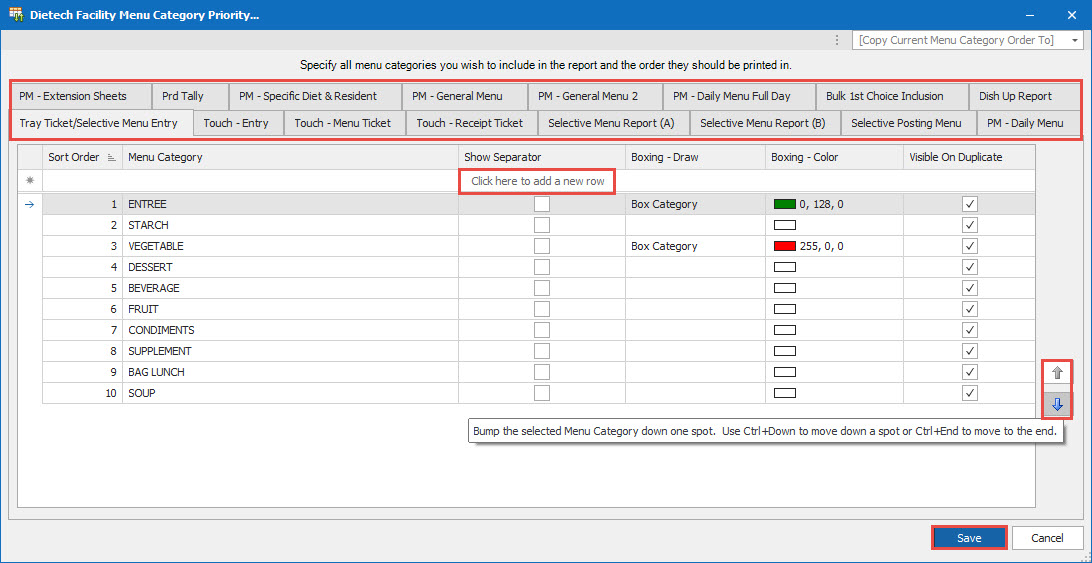
Each tab shows a report that you can control the order that the menu categories will print on for that report. Click on the appropriate tab. Use the Bump Up or Bump Down Arrows to move the category. Only one category can move at a time. If you no longer want a menu category visible highlight the line on that report and click on the delete key on your keyboard. If a menu category is missing click on the row marked "Click here to add a new row" choose your menu category. It will then show on the bottom of the list, use the Bump Up arrow to move to the correct spot ( the PM-stands for Posting Menus). Click Save when changes are complete.
More Options for some tabs.
4.
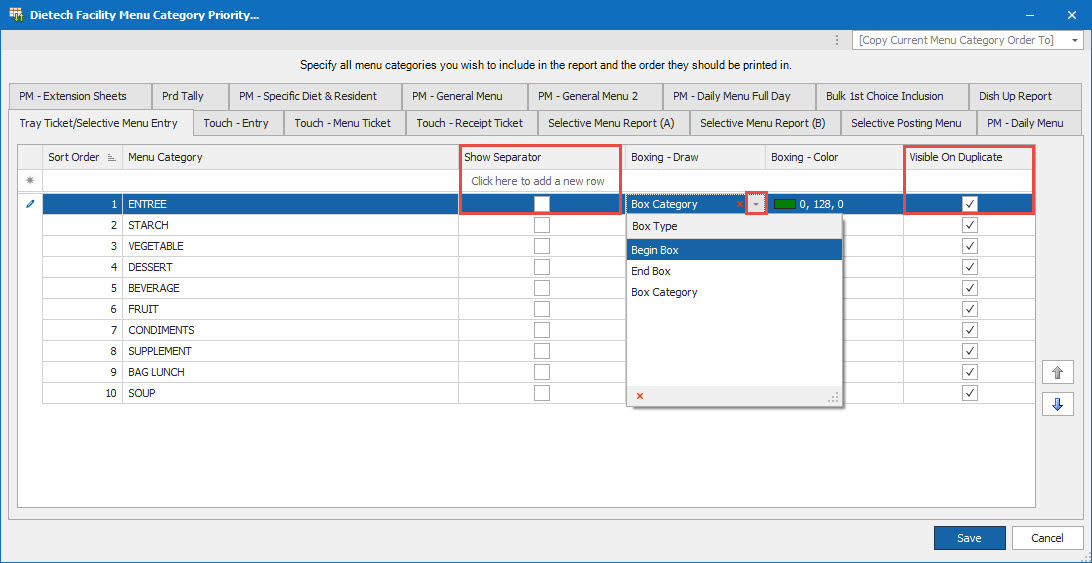
Tray Tickets and Touch Menu Tickets. (1) If you would like lines between the menu categories you can check the boxes on the Separator column. (2) You can also place boxes around menu categories or group of menu categories. (3) If using duplicate tickets, you can choose what menu category you would like visible on the duplicate ticket by checking the box in the Visible on Duplicate column. (Not on the Touch Menu Ticket).
5.
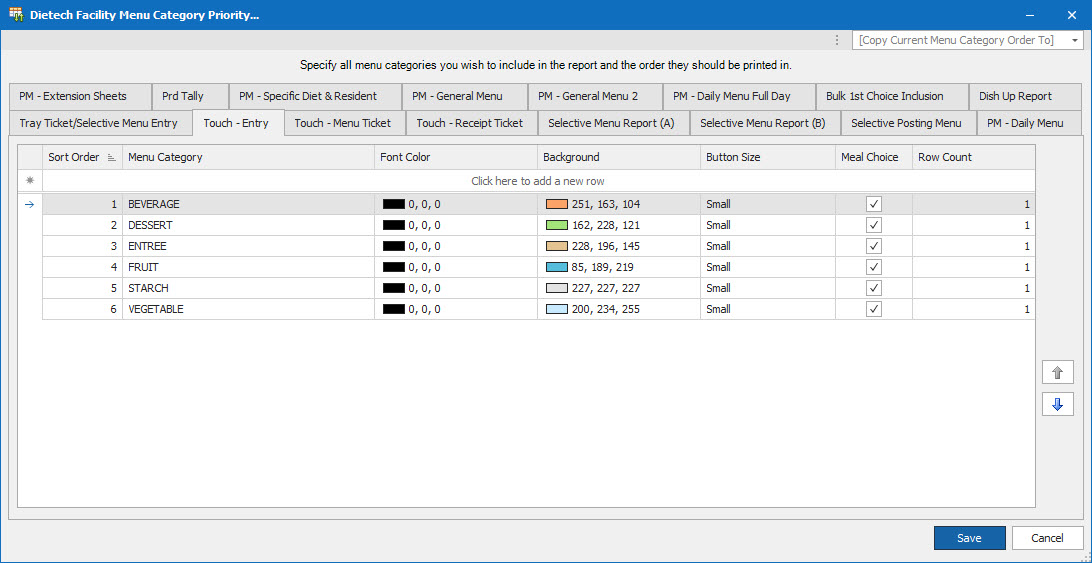
Touch Entry (eTableServ). (1) Choose Font Color (2) Choose Background Color (3) Choose Button Size (4) Choose Row Count.
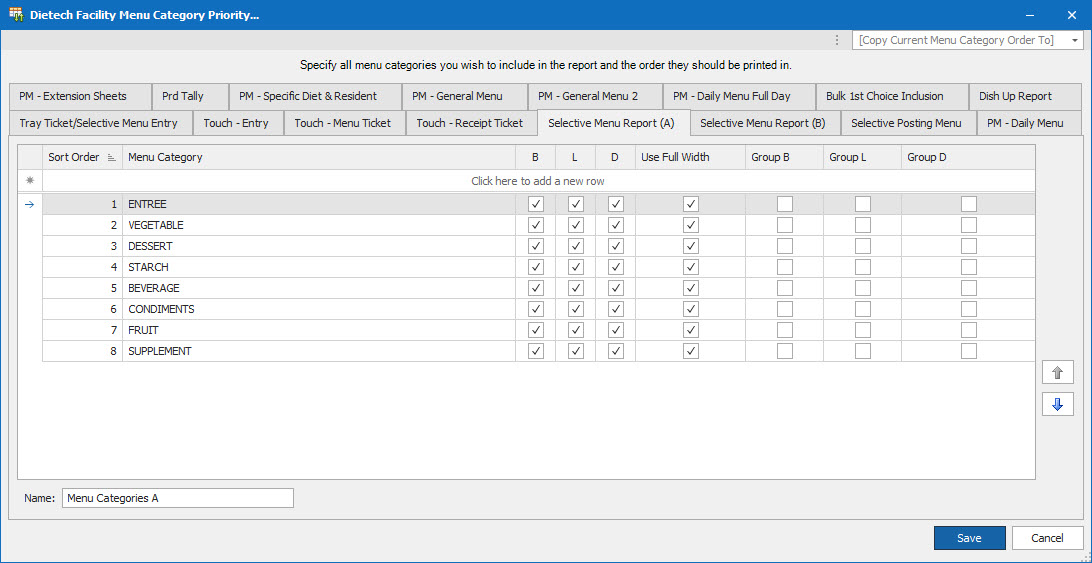
Selective Menu Report. (1) One Menu Category could show on the entire line if box is checked (2) group Menu Categories together for particular meals.
6.
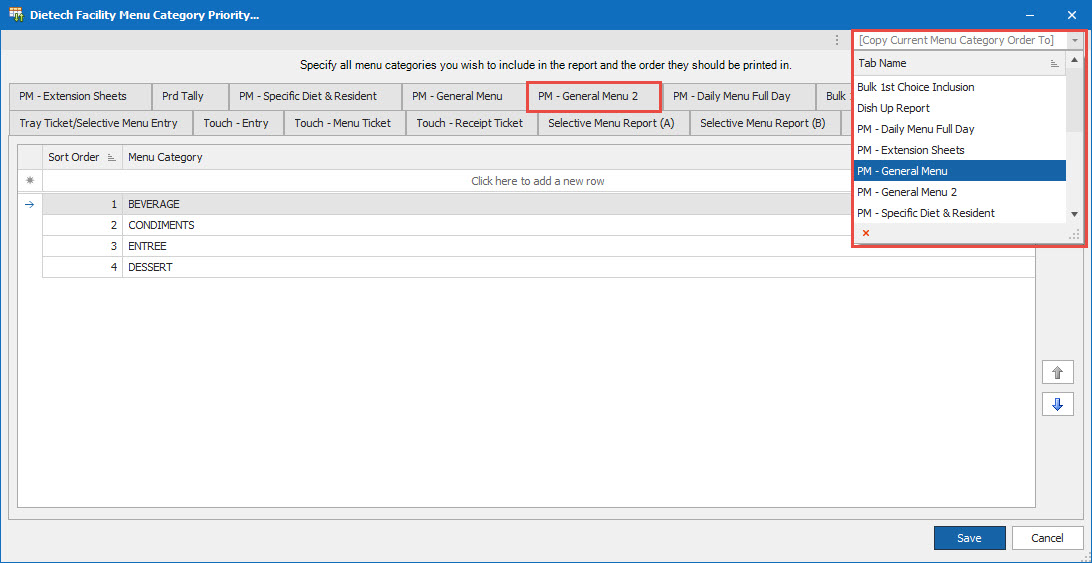
Copying Option for any tab. You can choose to copy the Menu Category order from the current tab to another tab. The example shown would take the order on the PM-General Menu 2 to the General Menu chosen under the tab (upper right).
